
TiviMate IPTV Player Master Guide: Complete Setup, EPG Configuration & Premium Features Tutorial
The definitive master walkthrough for TiviMate IPTV Player. Learn how to install on Firestick and Android TV, configure Xtream Codes API, unlock TiviMate Premium, master 9-screen multi-view, schedule SMB network recordings, and optimize buffer settings.
- Introduction: Why TiviMate is the King of Television-Based IPTV Players
- Architectural Excellence: Built Exclusively for Big Screens and Remotes
- Hardware Requirements and Platform Availability
- Step-by-Step Installation: Android TV, Google TV & Amazon Firestick
- Connecting Your TVoxar Subscription via Xtream Codes API
- TiviMate Free vs. Premium: Features and Activation via TiviMate Companion
- Mastering the 7-Day Electronic Program Guide (EPG)
- Setting Up Multi-View: Watch Up to 9 Live Matches Simultaneously
- Channel Customization: Groups, Favorites, Hiding Categories & Renumbering
- Using Catch-Up and Timeshift for Historical Broadcasts
- Configuring Local and Network (SMB) Video Recording (DVR)
- Backup and Restore: Transferring Your Setup Across Multiple TVs
- Performance Optimization: Buffer Sizing, Hardware Decoding & AFR Matching
- Troubleshooting Common TiviMate Errors and Glitches
- Frequently Asked Questions About TiviMate
- Summary and Next Steps with TVoxar IPTV
For viewers who primarily consume digital entertainment in the living room on a large-screen television using a physical directional remote control, no software on the global market compares to TiviMate IPTV Player. While conventional media player applications originated on touchscreens or desktop monitors and were subsequently retrofitted with awkward remote control workarounds, TiviMate was envisioned from its very first line of code as a dedicated television operating environment. It reproduces—and in many respects significantly surpasses—the speed, fluidity, and visual elegance of premium satellite set-top boxes and commercial telecommunications cable receivers.
However, because TiviMate is a deeply feature-dense application with hundreds of granular customization options, many users utilize only a fraction of its true potential. Novice subscribers frequently miss out on its hallmark capabilities: automated 9-screen multi-view displays during major sports weekends, multi-day catch-up scrubbing, custom channel category reordering, network-attached storage (SMB) digital video recording, and cross-device configuration backup.
In this comprehensive, exhaustive master tutorial, the TVoxar engineering team provides an end-to-end technical guide to TiviMate IPTV Player. You will learn how to install and license the application, authenticate your TVoxar subscription credentials using the high-performance Xtream Codes protocol, eliminate electronic program guide schedule gaps, build tailored sports layouts, set up network recording, and calibrate video buffer parameters for completely stutter-free 4K viewing.
Architectural Excellence: Built Exclusively for Big Screens and Remotes
To understand why TiviMate commands near-universal acclaim across home theater communities, one must examine its core design philosophies:
1. True 10-Foot User Interface Design In interface design, the "10-Foot Experience" refers to software designed to be viewed comfortably from ten feet away on a sofa and navigated exclusively using a directional pad (Up, Down, Left, Right, Select, Back). TiviMate eliminates: - Awkward mouse pointers that require an air-mouse or smartphone trackpad app. - Cluttered text menus with tiny clickable targets designed for touchscreens. - Jarring full-screen menu shifts that cut off active video and audio playback.
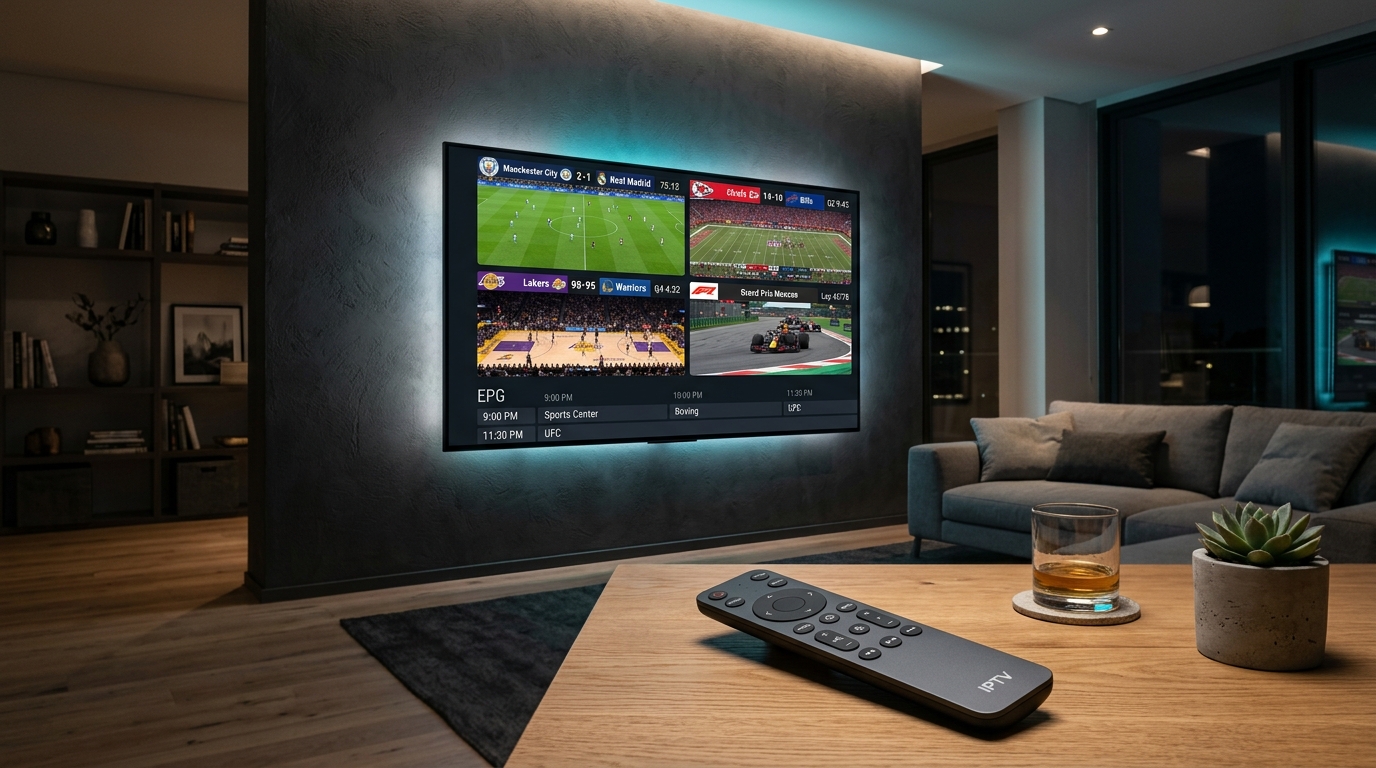
Instead, TiviMate features a translucent, layered Electronic Program Guide (EPG) grid that overlays the active broadcast. While you browse upcoming Premier League fixtures, read actor filmographies, or manage channel favorites, your current broadcast continues playing smoothly in the background or docks neatly into an adjustable Picture-in-Picture (PiP) window.
2. High-Performance SQLite Database Architecture Traditional IPTV applications parse monolithic M3U text files directly into volatile system RAM. When managing extensive channel lineups containing tens of thousands of live channels and VOD assets, this architecture exhausts system memory on budget streaming dongles, leading to sluggish channel scrolling and periodic app crashes.
TiviMate employs a high-performance local SQLite database cache. When you first connect your TVoxar IPTV pass, channel metadata, station logos, and schedule timelines are indexed into an organized local database. Subsequent category browsing, search queries, and guide scrolling execute with sub-millisecond database lookups, providing instantaneous responsiveness even on inexpensive streaming sticks.
3. Rapid Keyframe Decoding Engine TiviMate’s internal video pipeline incorporates optimized hardware decoding routines that aggressively seek and decompress stream I-frames (key transport frames). The practical result is sub-second channel zapping. Switching between live sports channels feels instantaneous, eliminating the frustrating 4-to-6-second black screen delays characteristic of generic media players.
Hardware Requirements and Platform Availability
Before installing TiviMate, review its operating system requirements and platform availability:
Supported Operating Systems TiviMate is compiled strictly for televisions and media streamers running: - Android TV (Version 5.0 Lollipop and higher) - Google TV (Chromecast with Google TV, Sony Bravia, TCL, Hisense) - Amazon Fire OS (Fire TV Stick Lite, HD, 4K, 4K Max, Fire TV Cube, Fire TV Edition televisions) - Dedicated Android Set-Top Boxes (Nvidia Shield TV, Formuler Z-Series, Mecool, Xiaomi Mi Box)
Platform Limitations (Samsung Tizen, LG webOS & Apple) A common inquiry from subscribers is how to download TiviMate on a Samsung Smart TV or Apple TV. TiviMate is NOT available on Samsung Tizen OS, LG webOS, Apple tvOS, Roku, or Windows. - Samsung and LG televisions run proprietary Unix-like operating systems that cannot execute Android APK binaries. If you own a Samsung or LG television, you can either install IBO Player Pro directly from your TV's app store (see our Smart TV app comparison), or plug an inexpensive Amazon Fire TV Stick 4K into an HDMI port to experience TiviMate on your display. - For Apple TV 4K owners, our technical team recommends IPTVX, which delivers a comparably refined, Apple-native home theater experience (see our Apple TV setup tutorial).
Step-by-Step Installation: Android TV, Google TV & Amazon Firestick
Follow these exact device-specific walkthroughs to install TiviMate cleanly on your streaming hardware.
Method 1: Installing on Android TV & Google TV (via Google Play Store)
If your television or streaming box is certified by Google (such as an Nvidia Shield, Chromecast with Google TV, or Sony Android TV):
1. Power on your device and launch the official Google Play Store.
2. Select the search icon and type TiviMate IPTV Player.
3. Select the official application (developed by AR Mobile Labs).
4. Click Install. The operating system will download and install the package automatically.
5. Launch the application directly from your apps row. Follow our dedicated Android TV configuration guide for further details.
Method 2: Installing on Amazon Fire TV Stick, 4K Max & Cube (Sideloading via Downloader) Because Amazon does not host TiviMate on the Amazon Appstore, Firestick users install the official APK via the free Downloader utility. This standard procedure takes under three minutes. Review our Firestick installation walkthrough for visual references.
Step A: Install the Downloader Application
1. From the Firestick home screen, click Find > Search.
2. Type Downloader, select the orange application icon, and click Download / Get.
Step B: Enable Developer Options for Unknown Apps 1. Navigate to Firestick Settings (Gear Icon) > My Fire TV. 2. If Developer Options is visible: Click it, select Install unknown apps, find Downloader, and toggle it to ON. 3. If Developer Options is hidden (Standard on modern Fire OS releases): Click About. Highlight your device name (e.g., Fire TV Stick 4K) and press the Center Select button on your remote continuously 7 times. A prompt will appear stating: "No need, you are already a developer." 4. Press Back, click the newly revealed Developer Options, select Install unknown apps, and toggle Downloader to ON.
Step C: Download and Sideload TiviMate 1. Open the Downloader app and grant storage permissions. 2. In the Downloader URL input field, enter the direct numeric shortcode or official download URL for the latest stable TiviMate APK release. 3. Click Go. Downloader will fetch the APK package. 4. When prompted, click Install on the Fire OS dialog. 5. After installation completes, click Done, and click Delete twice to erase the temporary APK installer and preserve device storage.
Connecting Your TVoxar Subscription via Xtream Codes API
Once TiviMate is launched, you will see a clean welcome screen displaying an Add Playlist button. While TiviMate supports raw M3U playlist links, connecting via the Xtream Codes API provides vastly superior performance, sub-second boot times, and automated EPG mapping.
Step-by-Step Connection Instructions
- Click the prominent Add Playlist button on the home screen.
- Select Xtream Codes from the playlist type options.
- Complete the three required server fields using the details from your TVoxar subscription confirmation email:
- Check the box labeled Include TV Channels.
- Check the box labeled Include VOD (if you wish to access TVoxar’s on-demand cinema and TV series library inside TiviMate).
- Click Next.
- TiviMate will display a prompt asking for a Playlist Name. Enter
TVoxar IPTV. - Check the box labeled Update Playlist on App Start.
- Click Done.
Within ten to thirty seconds, TiviMate will query TVoxar’s edge servers, build your category trees, download the 7-day electronic program guide, and display your active channel grid ready for streaming.
TiviMate Free vs. Premium: Features and Activation via TiviMate Companion
TiviMate operates on a freemium model. The free version allows basic single-channel live streaming, but the software's hallmark capabilities are unlocked with TiviMate Premium.
Free vs. Premium Capability Comparison
| Feature / Capability | TiviMate Free Edition | TiviMate Premium Edition |
|---|---|---|
| Live TV Playback | Yes (Single Channel) | Yes (Hardware Accelerated) |
| Electronic Program Guide (EPG) | Basic (Limited Timeline) | Full 7-Day Interactive EPG |
| Multi-View Screen Splitting | No | Yes (Up to 9 Screens Simultaneously) |
| Manual Channel Group Customization | No | Yes (Hide, Reorder, Rename, Favorites) |
| Catch-Up & Timeshift Navigation | No | Yes (Full Timeline Scrubbing) |
| Scheduled Digital Video Recording (DVR) | No | Yes (Internal, USB, SMB Network Shares) |
| Multiple Playlists Support | No (1 Playlist Only) | Yes (Unlimited Playlists) |
| Auto Frame Rate (AFR) Matching | No | Yes (Judder-Free 50Hz/60Hz Sync) |
| Custom Themes & UI Scaling | No | Yes (Fonts, Row Heights, Colors) |
How to Activate TiviMate Premium on Android TV If your device has access to the official Google Play Store (e.g., Nvidia Shield or Chromecast with Google TV): 1. In TiviMate, navigate to Settings > Unlock Premium. 2. Click Next and log in with your Google account. 3. Select an annual subscription or one-time lifetime license. 4. Google Play processes the purchase, and all Premium features unlock instantly across your device.
How to Activate TiviMate Premium on Amazon Firestick (TiviMate Companion Method) Because the Amazon Appstore does not use Google Play billing services, Firestick users cannot purchase TiviMate Premium directly on the Fire TV interface. Instead, you use the official TiviMate Companion app on an Android phone or PC emulator to purchase a license that links up to five simultaneous devices:
- On any Android smartphone or tablet, open the Google Play Store and install the free TiviMate Companion application.
- Open TiviMate Companion and create an account using your email address and a password.
- Purchase an annual pass or lifetime license through the Google Play payment gateway.
- Now, return to your Amazon Firestick, open TiviMate, go to Settings > Unlock Premium, and click Next.
- Enter the exact email address and password you just created in the TiviMate Companion app.
- Assign a name to your Firestick (e.g., Living Room Firestick 4K).
- Click Activate. Your Firestick immediately upgrades to TiviMate Premium! You can repeat this process on up to four additional streaming devices in your home.
Mastering the 7-Day Electronic Program Guide (EPG)
A blank or misaligned program guide ruins the television experience. TiviMate features the most sophisticated EPG engine in the industry, and optimizing it takes only moments.
Automating Daily Guide Updates 1. From the main channel guide, press the Left Arrow on your remote to reveal the left slide-out menu. 2. Navigate down to the Settings (Gear Icon). 3. Select EPG > EPG Sources. 4. Click on your TVoxar EPG source and ensure Update interval is set to Every 24 Hours. 5. Enable Update on App Start and Update on Playlist Change.
Resolving Timezone Schedule Discrepancies
If channel programs appear offset by an hour or two (for example, a football match scheduled for 8:00 PM displays as 6:00 PM in the guide):
1. Go to Settings > EPG > EPG Sources > TVoxar EPG.
2. Select Time Offset.
3. Adjust the slider in 30-minute increments (e.g., +1:00, +2:00, or -1:00) until the displayed broadcast times align perfectly with your domestic clock.
Manually Assigning Missing EPG Channels If an obscure international sports channel displays "No Information": 1. Highlight the channel in the guide and Long Press the Center Select Button on your remote. 2. In the right-side options menu, select Assign EPG. 3. Use the search bar to find the matching station feed from TVoxar’s master EPG list. 4. Select the matching ID. TiviMate will immediately link the schedule and channel logo to that channel.
Setting Up Multi-View: Watch Up to 9 Live Matches Simultaneously
For sports fans, TiviMate’s Multi-View feature is transformative during Champions League group stages, NFL RedZone Sundays, or simultaneous combat sports fixtures across our live sports channels.
Step-by-Step Multi-View Activation 1. Tune into any live sports channel in full screen. 2. Press the Center Select Button on your remote to display the on-screen playback controller. 3. Navigate to the bottom right of the controller ribbon and click the Multi-view icon (represented by overlapping screens). 4. TiviMate shrinks your active broadcast into a split panel and opens an Add Screen slot. 5. Click Add Screen, browse your TVoxar sports categories, and select your second live match. 6. Repeat this process to add a third or fourth screen (TiviMate supports up to 9 simultaneous panels on capable hardware!).
Managing Multi-View Playback - Switching Audio Feeds: Use the directional arrows on your remote to highlight any active panel. The audio immediately switches to the highlighted feed, indicated by a subtle glowing border. - Full-Screen Zoom: Highlight any panel and press the Center Select Button to expand that match to full screen instantly when a goal is scored. Press Back to return to your multi-view grid. - Layout Configurations: In the Multi-view menu, cycle between standard 2-screen split, 3-screen layout (one large primary window with two side feeds), or balanced 4-screen quad grids.
Hardware & Bandwidth Advisory: Streaming four 60fps feeds simultaneously requires 4x the bandwidth of a single stream (approx. 40–60 Mbps). Connect your device via Ethernet or a 5GHz Wi-Fi band, and ensure your subscription plan supports concurrent connections. Explore our pricing passes for multi-screen account options.
Channel Customization: Groups, Favorites, Hiding Categories & Renumbering
TVoxar provides thousands of global channels, but no viewer watches every regional package. TiviMate allows you to tailor your guide so you only see the channels that matter to your household.
Creating a Custom Favorites List 1. While scrolling the EPG, highlight any channel you love. 2. Long Press the Center Select Button to bring up the side menu. 3. Select Add to Favorites (a star icon will appear next to the channel name). 4. All starred channels automatically aggregate into a dedicated Favorites mega-group at the very top of your guide for one-click access.
Hiding Unwanted International Groups 1. Open the left slide-out menu and scroll to the bottom. 2. Select Manage Groups > TVoxar IPTV > Groups. 3. You will see a list of every regional and genre folder (e.g., UK Sports, US Entertainment, France, Germany, Arabic). 4. Simply toggle OFF any countries or categories you do not speak or watch. 5. Return to the guide. The hidden categories disappear completely, decluttering your viewing environment.
Reordering Categories and Channels - In the Manage Groups menu, highlight any category (e.g., Live Sports 60 FPS), click Reorder, and use the remote arrow keys to move the category to the very top of your channel list. - You can perform the exact same manual reordering on individual channels within any group.
Using Catch-Up and Timeshift for Historical Broadcasts
Never panic if you arrive home thirty minutes after kickoff. On TVoxar channels equipped with catch-up functionality, TiviMate integrates historical playback directly into the program guide:
How to Identify and Launch Catch-Up 1. In the EPG grid, look for a small Clock / Rewind Icon next to channel names that support the archive protocol. 2. Using the remote left arrow, scroll backward in time past the current live timeline marker to previous programs. 3. Highlight any completed match or television episode from earlier in the day or previous days. 4. Press Select. TiviMate immediately launches the historical stream from our archive servers. 5. Use your remote’s Rewind, Fast-Forward, and Pause buttons to scrub through the broadcast with full control.
Configuring Local and Network (SMB) Video Recording (DVR)
TiviMate includes a full-featured Digital Video Recorder (DVR) capable of recording live broadcasts even while your television display is turned off.
Why You Should NOT Record to Internal Device Storage Most streaming sticks have only 4GB to 8GB of total storage, with much of it occupied by the operating system. A single two-hour 4K 60fps football match can generate 6GB to 10GB of video data. Recording to internal storage will quickly trigger out-of-memory errors, crash the recording, and freeze the streaming stick.
Option 1: Attaching an External USB 3.0 Flash Drive 1. For Nvidia Shield: Plug a USB 3.0 flash drive or external SSD directly into one of the rear USB ports and format it as removable storage. 2. For Firesticks: Connect a micro-USB OTG cable to split the power port, plug in a FAT32-formatted USB drive. 3. In TiviMate, go to Settings > Other > Recording > Recording Folder. 4. Select your external USB drive as the target directory.
Option 2: Configuring a Network Attached Storage (SMB Share)
The ultimate setup stores recordings directly onto your home computer, NAS, or network router over local Wi-Fi:
1. On your Windows PC, Mac, or NAS, create a folder named TV_Recordings and enable local network file sharing (SMB protocol).
2. In TiviMate, navigate to Settings > Other > Recording > Recording Folder > Select Folder > Setup LAN / SMB.
3. Enter your computer's local IP address (e.g., 192.168.1.50), share name (TV_Recordings), and your computer username and password.
4. TiviMate validates the connection. You now have hundreds of gigabytes of seamless DVR recording capacity!
Backup and Restore: Transferring Your Setup Across Multiple TVs
After spending twenty minutes organizing favorite channels, hiding unused categories, and configuring EPG offsets, you do not want to repeat the entire process on the bedroom TV or kitchen display.
Creating an Instant Backup File
1. In TiviMate, go to Settings > General > Backup Data.
2. Select a target storage directory (your internal storage, USB drive, or SMB network share).
3. TiviMate exports a compact .tmb backup configuration file containing your playlists, custom favorites, hidden groups, and settings.
Restoring to Another Television
1. Install TiviMate on your second streaming device.
2. Navigate to Settings > General > Restore Data.
3. Select your exported .tmb backup file.
4. Within two seconds, your second TV mirrors the exact channel order, favorites, and visual theme of your primary living room setup!
Performance Optimization: Buffer Sizing, Hardware Decoding & AFR Matching
To ensure completely buffer-free playback across live 60fps sports and 4K cinema:
1. Calibrating Internal Jitter Buffering - Navigate to Settings > Playback > Buffer Size. - Change the buffer setting from None to Medium (approx. 5 seconds) or Large (approx. 10 seconds). - A 5-second buffer stores a small safety reservoir of video in memory, absorbing momentary Wi-Fi packet jitter without interrupting video playback. Learn more in our anti-buffering troubleshooting handbook.
2. Auto Frame Rate (AFR) Matching - Go to Settings > Playback > Auto Frame Rate (AFR). - Toggle AFR to ON. - Why this matters: Television broadcasts in Europe and the UK typically air at 50Hz, while North American sports air at 59.94Hz or 60Hz. When AFR is active, TiviMate signals your television display to match the broadcast refresh rate precisely, completely eliminating visual frame judder.
3. Audio Passthrough - In Settings > Playback, set Audio Passthrough to ON. - This instructs TiviMate to deliver raw Dolby Digital (AC-3) bitstreams directly to your external soundbar or AV receiver.
Hardware Benchmark Comparison: Which Streaming Device Runs TiviMate Best?
While TiviMate can technically be sideloaded onto almost any Android-powered gadget, your overall experience—particularly during intensive operations like 4-way multi-view, high-bitrate 4K 60fps sports, and background SMB recording—depends heavily on your device's system-on-chip (SoC), RAM architecture, and network hardware.
Here is how the top streaming hardware options on the market benchmark when powering TiviMate IPTV Player with TVoxar:
| Hardware Device | RAM & Storage | Max Multi-View Panels | Video Codec Decoding | Recording Capability | Overall TiviMate Grade |
|---|---|---|---|---|---|
| Nvidia Shield TV Pro (2019) | 3 GB RAM / 16 GB ROM | Up to 9 Concurrent Feeds | HEVC, H.264, VP9, MPEG-2 | Dual USB 3.0 Ports (Direct SSD/HDD) | A+ (The Gold Standard) |
| Amazon Fire TV Cube (3rd Gen) | 2 GB RAM / 16 GB ROM | Up to 4–6 Concurrent Feeds | AV1, HEVC, H.264, VP9 | USB port with OTG, Ethernet Port Built-in | A (Superb Processing) |
| Fire TV Stick 4K Max (2nd Gen) | 2 GB RAM / 16 GB ROM | Up to 4 Concurrent Feeds | AV1, HEVC, H.264, VP9 | Micro-USB OTG required for external USB | A- (Best Value Stick) |
| Chromecast with Google TV (4K) | 2 GB RAM / 8 GB ROM | Up to 2–3 Concurrent Feeds | AV1, HEVC, H.264, VP9 | USB-C Hub required for external drives | B+ (Smooth UI, Limited Storage) |
| Onn 4K Pro Streaming Box (Google TV) | 3 GB RAM / 32 GB ROM | Up to 4 Concurrent Feeds | AV1, HEVC, H.264, VP9 | USB 3.0 Port Built-in + Ethernet | A- (Budget Powerhouse) |
| Generic Budget Android Boxes (Rockchip/Allwinner) | 1–2 GB RAM / 8 GB ROM | 1 Feed (Frequent Stutters) | Variable / Software fallback | Unreliable write speeds | D (Not Recommended) |
Why RAM and Hardware Decoding Dictate Multi-View Performance When you activate a four-screen multi-view grid on TiviMate, your device is not merely scaling four images. The hardware video decoder must decompress four separate compressed H.264 or HEVC transport streams concurrently in real time. On underpowered devices equipped with only 1GB of RAM (or cheap uncertified generic media boxes), the video hardware decoding pipeline quickly runs out of buffer memory, forcing frame drops, audio sync drift, or hard app crashes.
For the smoothest experience with TVoxar's high-bitrate sports streams, we strongly suggest utilizing devices with at least 2GB to 3GB of RAM and official Google Play Certification, such as the Nvidia Shield Pro, Fire TV Stick 4K Max, or Fire TV Cube. For detailed device-specific sideloading walkthroughs, review our dedicated Amazon Firestick setup guide and our Android TV configuration walkthrough.
Remote Control Customization & Key Mapping Shortcuts
One of TiviMate's most powerful yet underutilized capabilities is its complete remote button mapping engine. In traditional television setups, changing audio tracks, cycling aspect ratios, or opening the multi-view screen requires digging through deep contextual menus. TiviMate lets you assign custom single-click, long-press, and double-click actions to every button on your remote.
How to Access the Key Mapping Engine 1. Open TiviMate and navigate to Settings > Remote Control. 2. Select the operational context you wish to customize: - Player: Controls behavior while watching full-screen television. - TV Guide: Controls behavior while browsing the EPG grid. 3. Choose the button you want to reprogram (e.g., Left, Right, Up, Down, Center Select, Rewind, Fast-Forward, or dedicated colored buttons).
Recommended Key Customizations for Power Users: - Center Select (Long Press): Assign to Show Quick Menu or Toggle Multi-View. This lets you jump straight into split-screen mode without interrupting the active audio broadcast. - Left Button (In Full Screen): Assign to Open Channel List / Mini-Guide. This overlays a transparent channel sidebar over the current match without obscuring the live action. - Right Button (In Full Screen): Assign to Auto Frame Rate Toggle or Audio Track Switcher. If you frequently switch between primary commentary and stadium atmosphere tracks, this provides one-tap switching. - Back Button (Long Press): Assign to Return to Previous Channel (Recall/Last Channel). This lets you bounce back and forth between two critical games on commercial breaks with zero searching. - Play/Pause Button (Long Press): Assign to Open Search Dialog. Quickly enter voice or keyboard queries across your entire TVoxar channel and VOD catalog.
Troubleshooting Common TiviMate Errors and Glitches
If you encounter an operational hurdle, consult this quick reference:
1. Error 401 / 403 / "Could Not Connect to Server" - Verify that your username, password, and server URL in playlist settings match your welcome email exactly. - Check that your streaming device's system time is set to automatic network time; misaligned device clocks break server authentication handshakes.
2. "No Information" Across All Guide Rows - Go to Settings > EPG > Clear EPG Data, followed immediately by Update EPG Now. - Ensure your device has an active internet connection. If your ISP is filtering EPG metadata, connect through an encrypted VPN. See our best VPNs for IPTV guide.
3. Video Drops Frames or Lags on Live Sports - Go to Settings > Playback and confirm that Hardware Acceleration (HW) is activated for both Live TV and VOD. - Disable aggressive television motion smoothing in your TV’s picture settings menu.
Frequently Asked Questions About TiviMate
How many devices can I activate with a single TiviMate Premium license? A single TiviMate Premium license covers up to five (5) concurrent devices. You can manage, rename, or deactivate connected devices at any time through the official TiviMate Companion app.
Does TiviMate include any channels when I download it? No. TiviMate is purely an advanced media player software client. It contains no pre-loaded channels or playlists. You must connect it to a high-performance streaming provider like TVoxar IPTV to access live television, sports, and video on demand.
Can I run multiple playlists simultaneously and combine them in TiviMate? Yes! TiviMate Premium supports multiple concurrent playlists. You can add a secondary backup playlist or a dedicated on-demand movie server alongside your primary TVoxar subscription. In the channel list, you can view playlists separately or merge them into a unified, consolidated channel guide with customized group names.
Does TiviMate support subtitles and multiple audio commentary tracks? Yes. During live playback, pressing the remote arrow down brings up the media bar where you can select between embedded subtitle tracks (teletext, closed captions, and SRT subtitles) and alternative audio tracks (such as Spanish commentary, radio broadcast sync, or natural stadium sound).
Can I install TiviMate on my Windows PC or Mac? There is no native Windows or macOS executable. However, you can run TiviMate flawlessly on a PC or Mac by installing a free Android emulator such as BlueStacks or LDPlayer, opening the emulated Google Play Store, and installing TiviMate directly. Alternatively, review our Windows & Mac setup guide for native desktop alternatives like IPTV Smarters Desktop.
What should I do if a stream buffers on TiviMate? First, increase your buffer size to Medium or Large in Settings > Playback. Next, connect your streaming device to 5GHz Wi-Fi or Ethernet. If your ISP is throttling your line during peak sports hours, connect to a fast WireGuard VPN server.
Summary and Next Steps with TVoxar IPTV
TiviMate IPTV Player is the undisputed pinnacle of television-based streaming applications. Its cable-box-style EPG, sub-second channel zapping, 9-screen multi-view, and comprehensive recording capabilities make it the ultimate centerpiece of any modern living room.
Pair TiviMate with the high-reliability streaming infrastructure it deserves. Explore our flexible TVoxar IPTV subscription passes, test our proprietary Anti-Freeze 9.3 protocols, and enjoy uninterrupted 4K sports and cinema on your big screen today. If you need any assistance with configuration, our 24/7 technical team is always ready to help.
Related Guides & Tutorials
Enhance Your IPTV Streaming Experience
Get premium 4K channels and sports feeds with TVoxar's Anti-Freeze 9.3 network.